

New Zealand isn’t just beautiful it’s one of the best hiking destinations in the world.
What makes it so special is the diversity. One day you’re walking through volcanic landscapes that feel like another planet, the next you’re surrounded by alpine lakes, forests, or dramatic coastlines.
During my time there, I tested some of the most iconic hikes (and a few underrated ones too). Some were challenging, some were surprisingly accessible but all of them were unforgettable.
Here’s a complete guide to the best hikes in New Zealand, with everything you actually need to know before going.
This article may contain affiliate links. If you book through these links, I may earn a small commission at no extra cost to you.
1. Tongariro Alpine Crossing – The Most Iconic Hike in New Zealand
The Tongariro Alpine Crossing is often ranked as one of the best day hikes in the world and it truly deserves that reputation.
We started at sunrise, around 6am, which I highly recommend. The first part of the track is relatively easy and allows you to warm up before the terrain becomes more challenging.
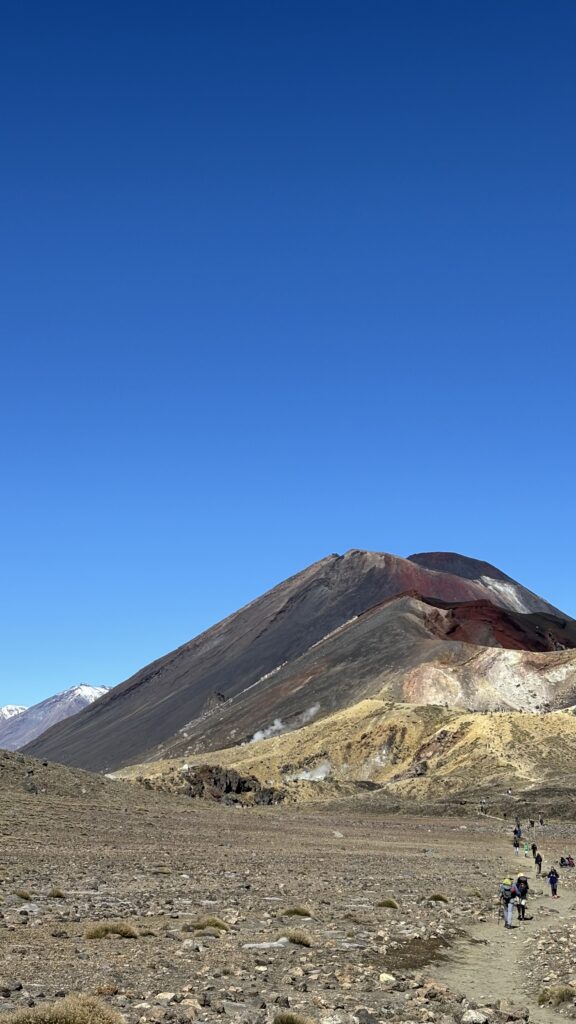
The most demanding section comes just before reaching the Red Crater: a steep climb that feels intense, but remains manageable if you pace yourself and take breaks.
And then, everything opens up.
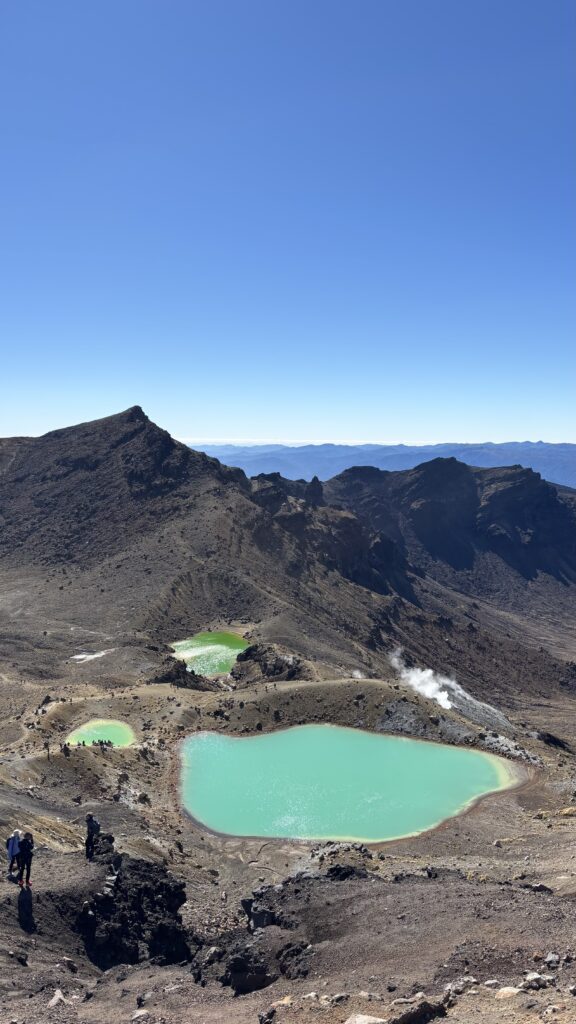
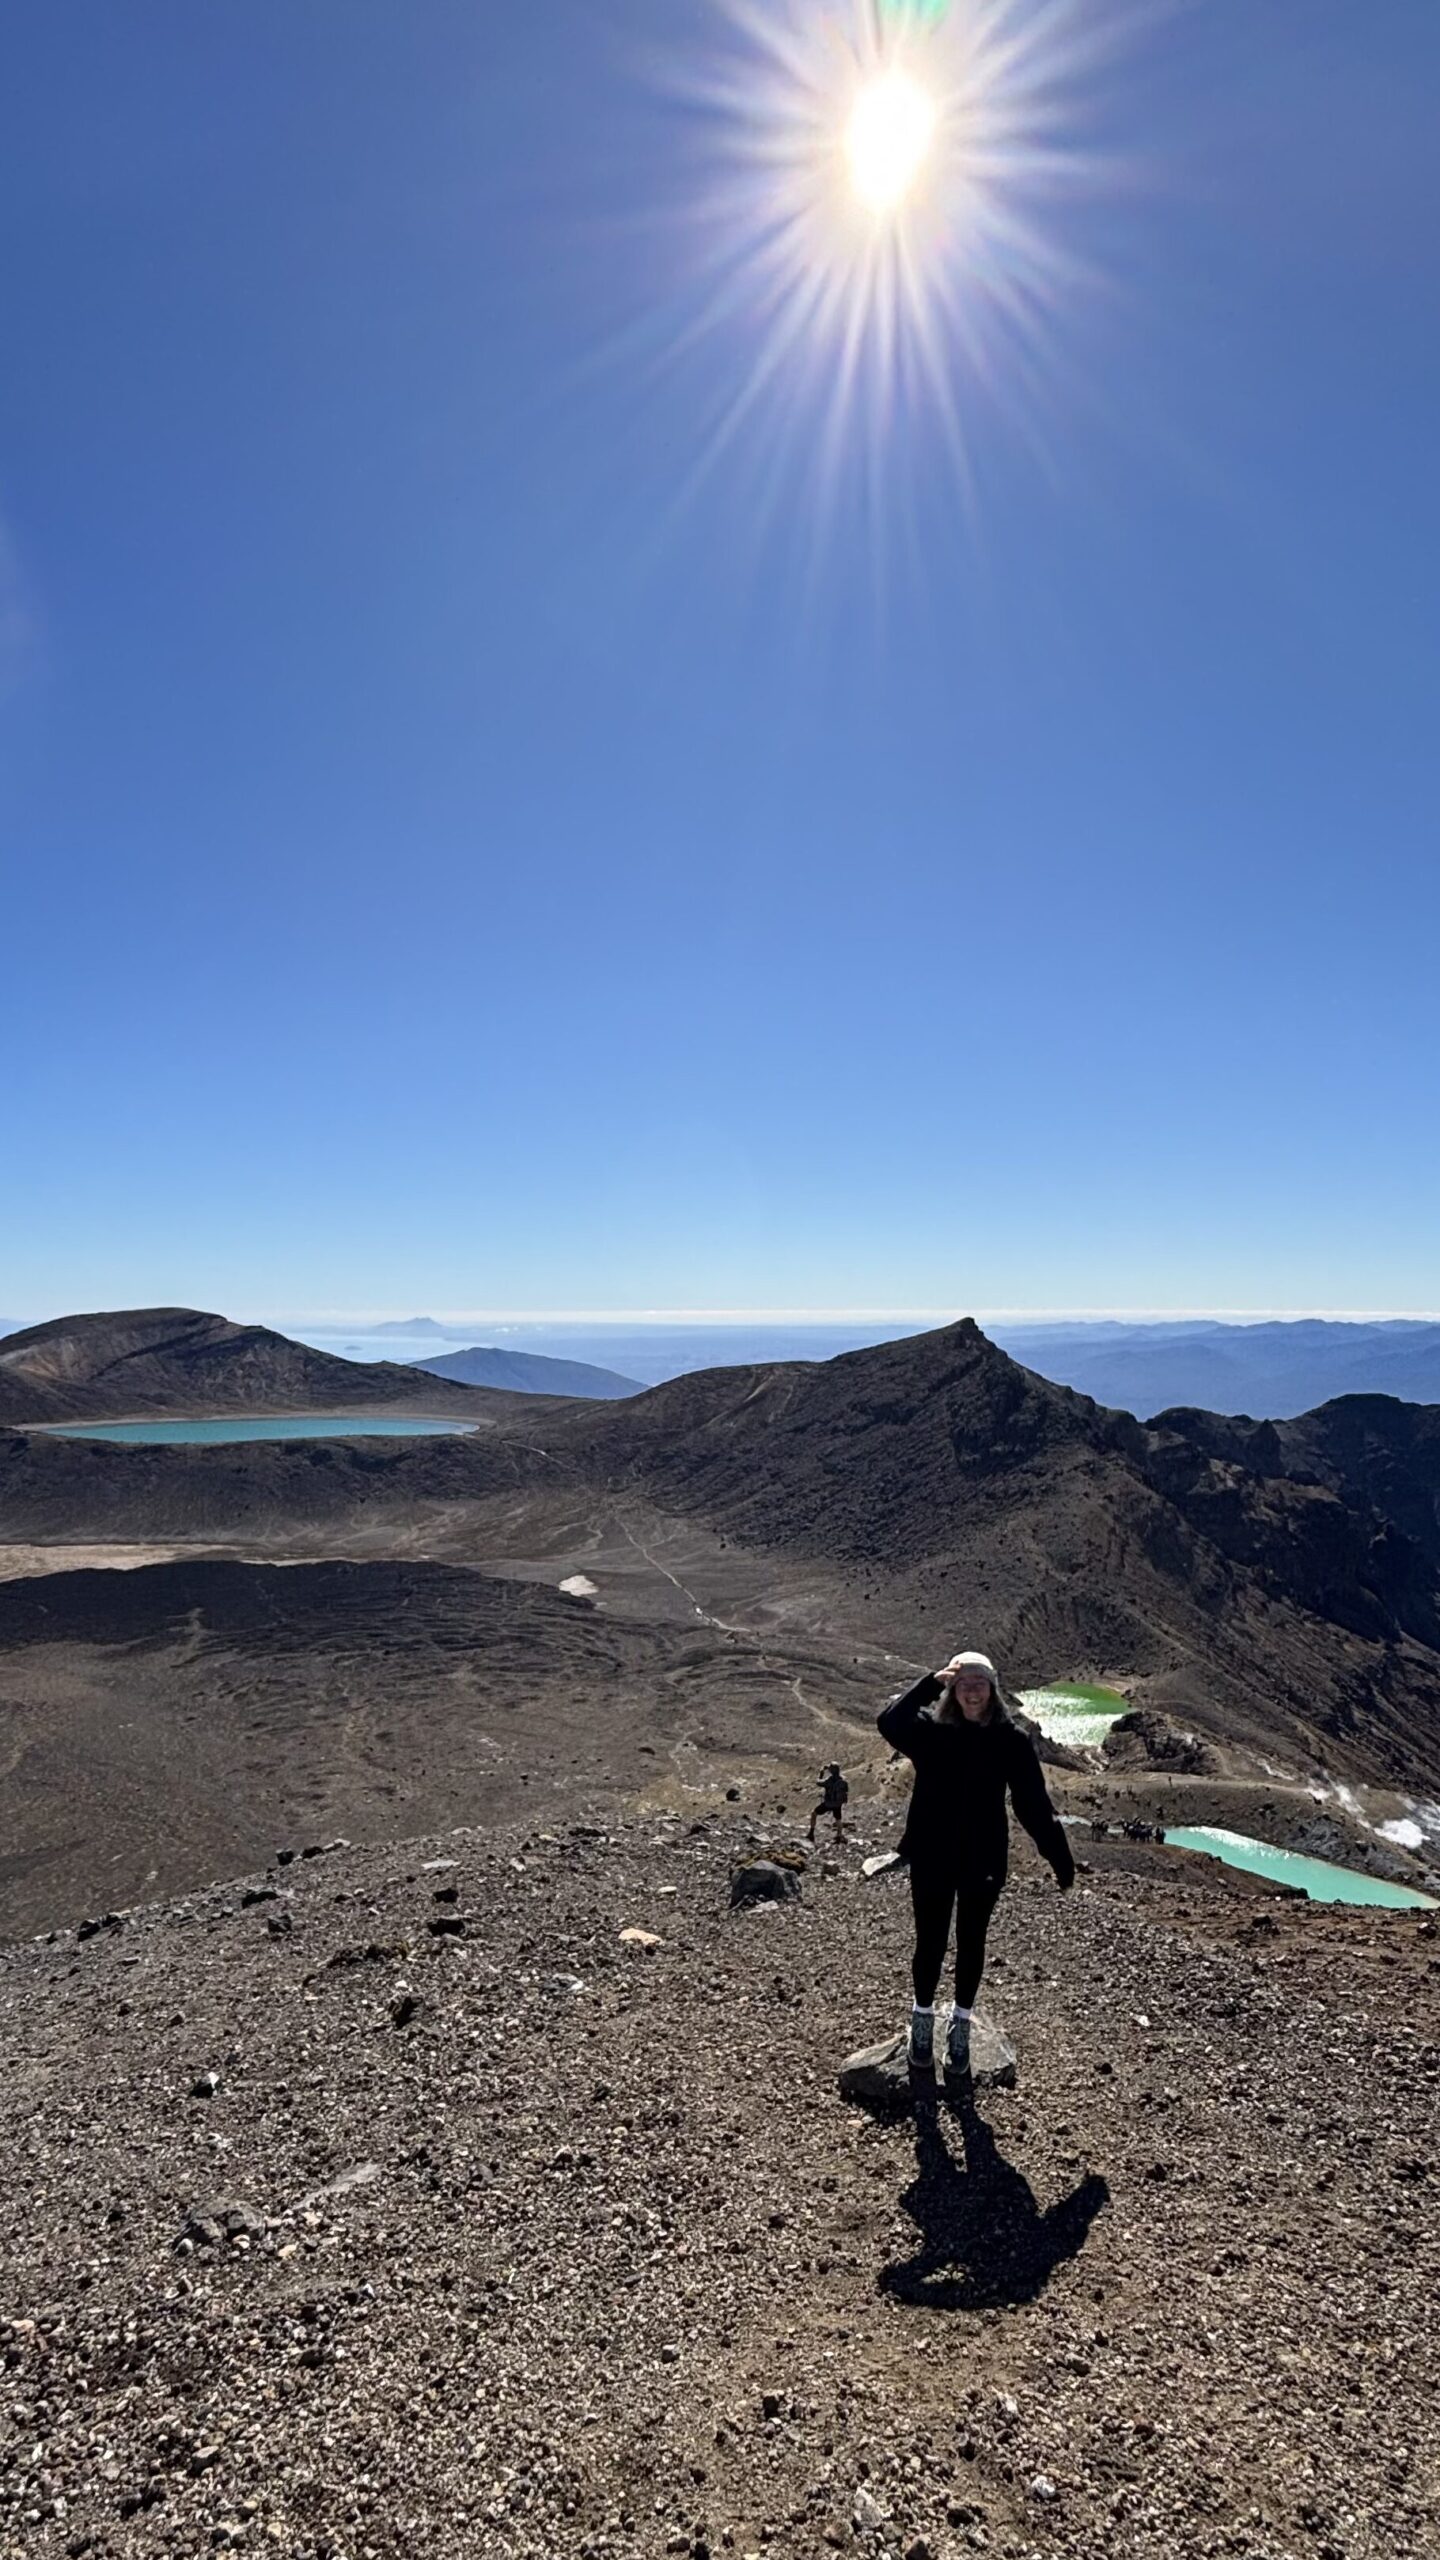
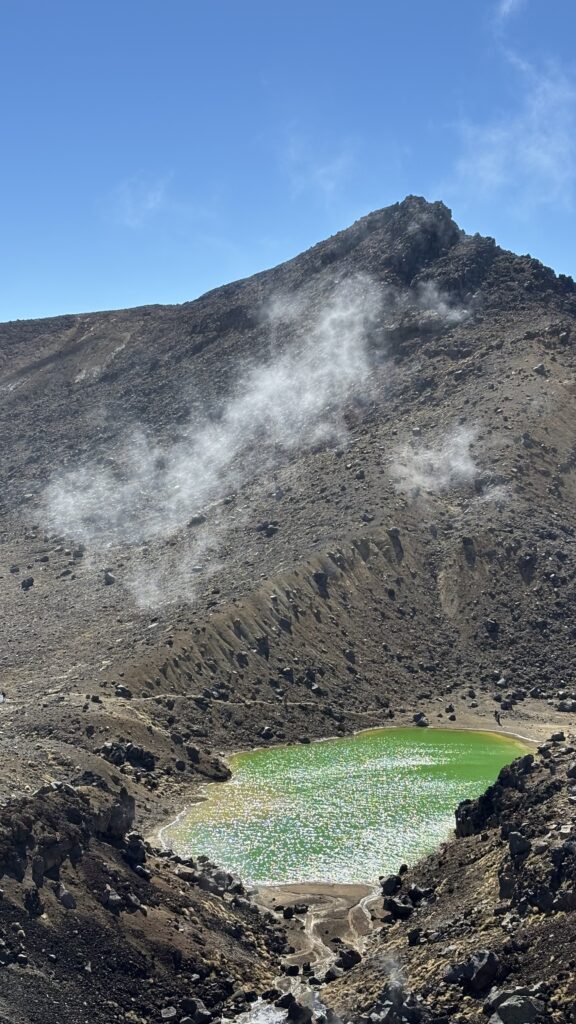
The Emerald Lakes appear in unreal shades of green, surrounded by a raw volcanic landscape that feels almost surreal. It’s not hard to understand why this area was used in The Lord of the Rings film trilogy as Mordor.
We had incredibly clear weather and could even see Mount Taranaki in the distance, something that doesn’t happen often.
The descent is long and can be tough on your knees, especially with loose volcanic gravel. This is where many people underestimate the hike.
Practical Information
- Distance: 19.4 km
- Duration: 6–9 hours
- Elevation gain: ~800 m
- Difficulty: Moderate to challenging
Transport & Parking
- This is a one-way hike (start ≠ finish)
- Most common option:
- Park at Ketetahi car park (end point)
- Take a shuttle to the start
- Park at Ketetahi car park (end point)
- Shuttle bookings are strongly recommended knowing that:
- Parking at Mangatepopo is heavily restricted
- Maximum 4 hours parking
- The hike usually takes 6/8 hours
- Parking at Mangatepopo is heavily restricted
Weather & Safety
- Alpine environment → conditions change VERY quickly
- Strong winds, cold temperatures, and low visibility are common
- Snow and ice possible outside summer
- Always check the official forecast before going
What to Bring
- Waterproof + windproof jacket
- Warm layers (even in summer)
- 2L+ water (no refill points)
- Snacks / lunch
- Sunscreen (very high UV exposure)
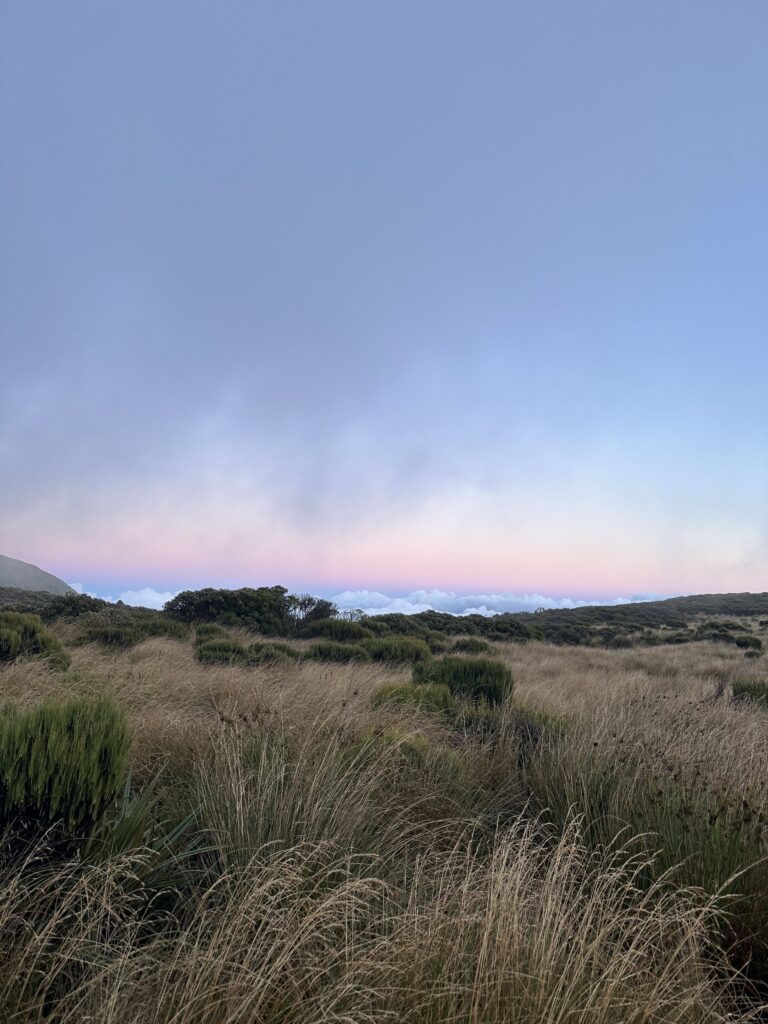
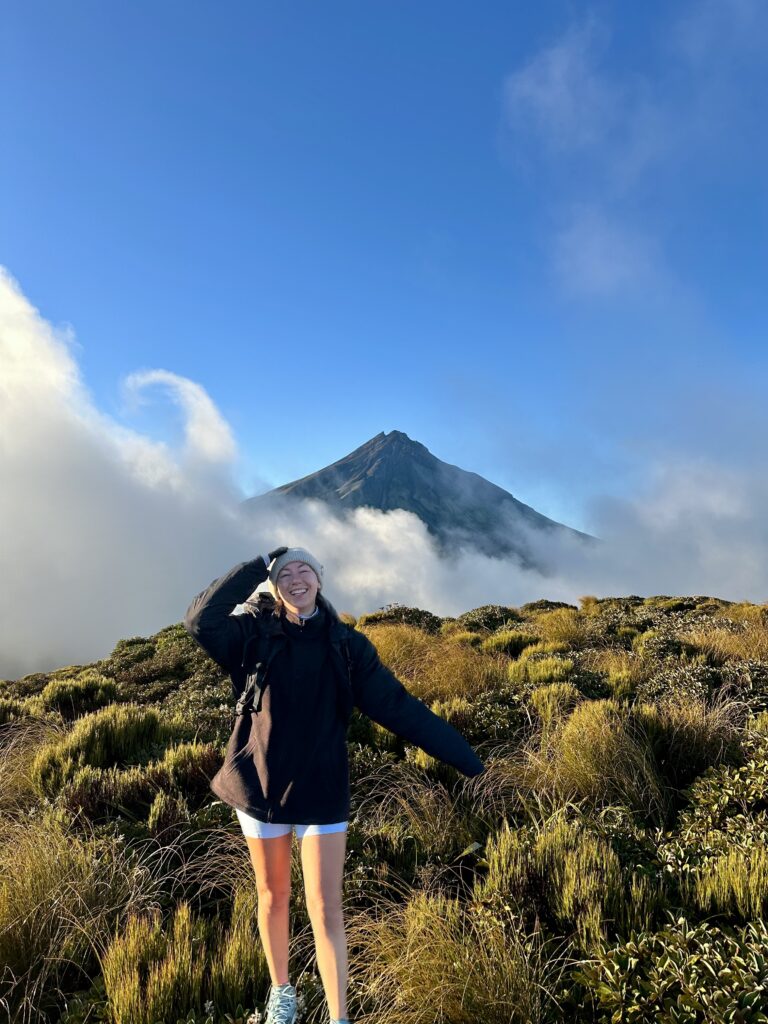
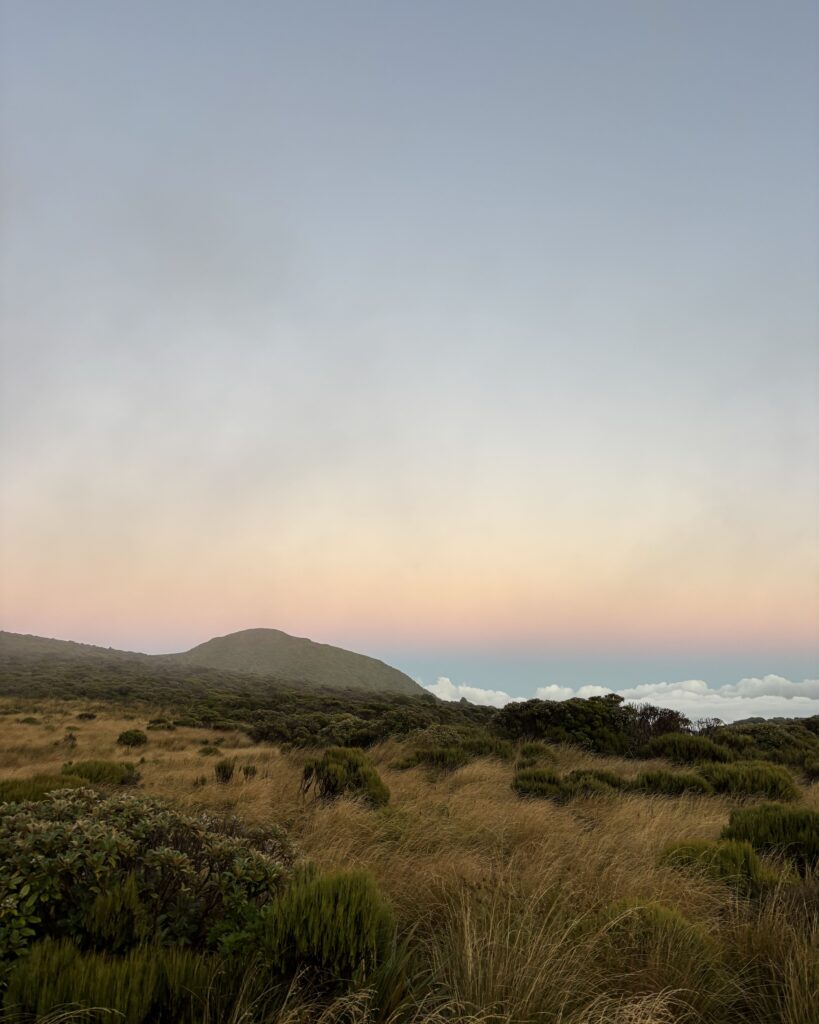
2. Mount Taranaki (Pouakai Tarns) – A Sunrise You Have to Earn
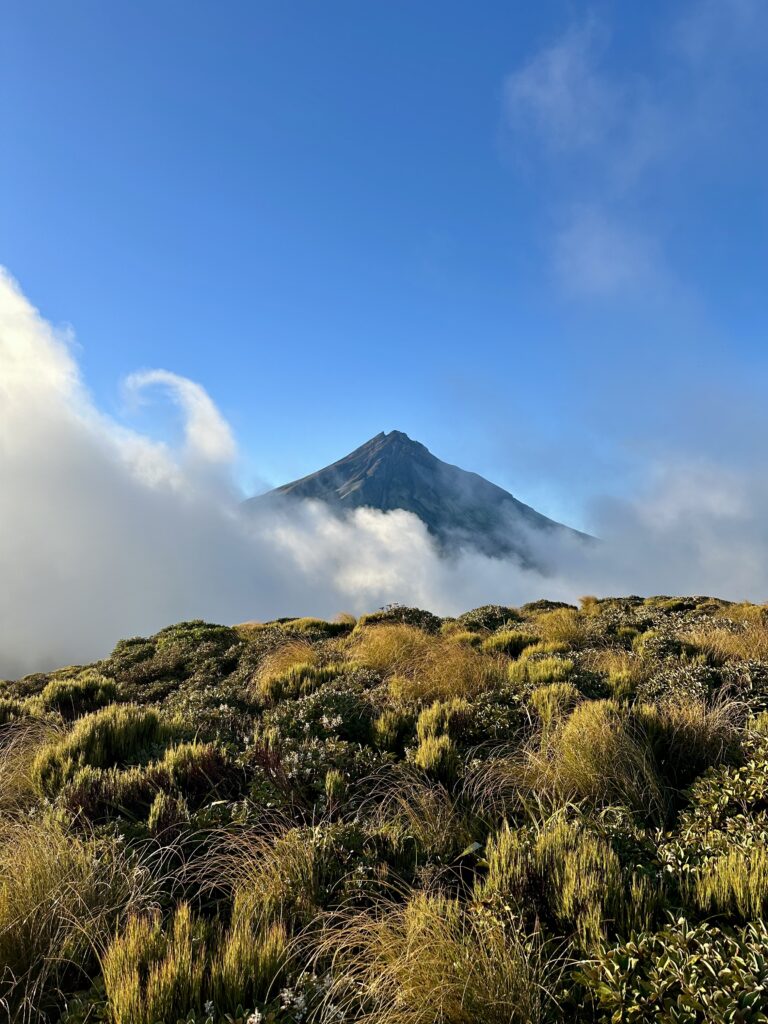
Mount Taranaki is one of the most photogenic mountains in New Zealand, especially when reflected in the lake mirror of the Pouakai Tarns.
We started around 4am, hiking in complete darkness with headlamps. The track is mostly made of stairs, which makes it physically demanding but not technically difficult.
It honestly feels like it never ends but the slow, steady pace makes it manageable.
After about 2 hours, we reached the top just in time for sunrise.
One thing that really stood out: the temperature difference. During the climb, in the forest, it was quite warm. But once we reached the top, the wind made it freezing.
We didn’t get the reflection that day because of clouds which shows how dependent this hike is on weather conditions.
For the iconic mirror lake view of Mount Taranaki, I highly recommend hiking to the Pouakai Tarns. For more adventurous hikers, it’s also possible to summit Mount Taranaki via a different and much more challenging track
Practical Information
- Distance: 6–8 km return
- Duration: 4–5 hours
- Elevation gain: ~600 m
- Difficulty: Moderate
Gear & Preparation
- Headlamp is essential for sunrise hikes
- Warm layers, gloves, and wind protection recommended
Best Conditions
- Clear sky + low wind = ideal
- Cloud cover can completely block the view
- Sunrise offers the best chance for reflections
Parking
- Small car park at the trailhead (Mangorei car park)
- Can fill up early in peak season
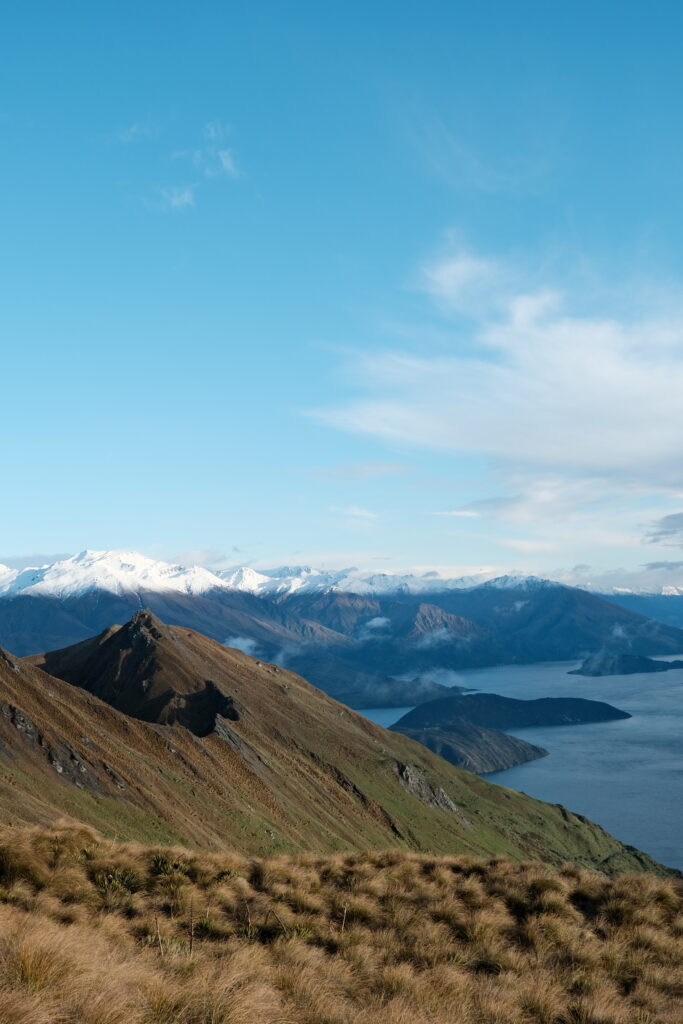
3. Roy’s Peak – The Ultimate Sunrise Challenge
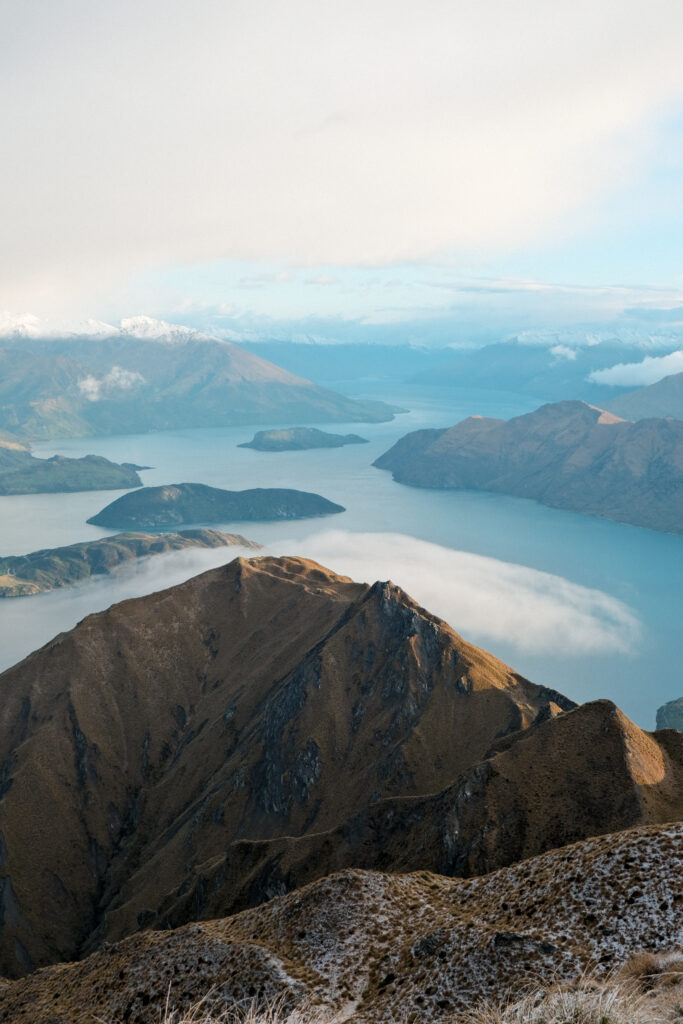
Roy’s Peak is one of the most famous hikes in the country and one of the most physically demanding on this list.
The trail starts climbing almost immediately and doesn’t really stop until the top. There are no flat sections, which makes it mentally challenging.
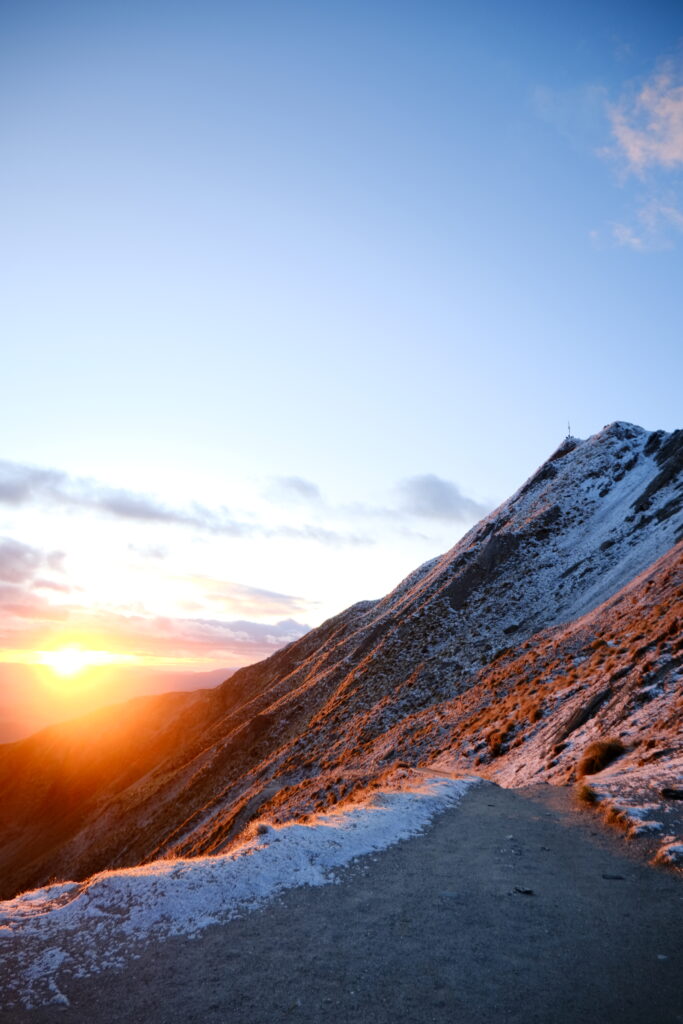
We started at 3am, and honestly, hiking in the dark made it feel easier. Not seeing how far you still have to go is a blessing.
I did it in November, and despite the effort, it was freezing the entire way up. There’s no forest, no shelter, just exposure.
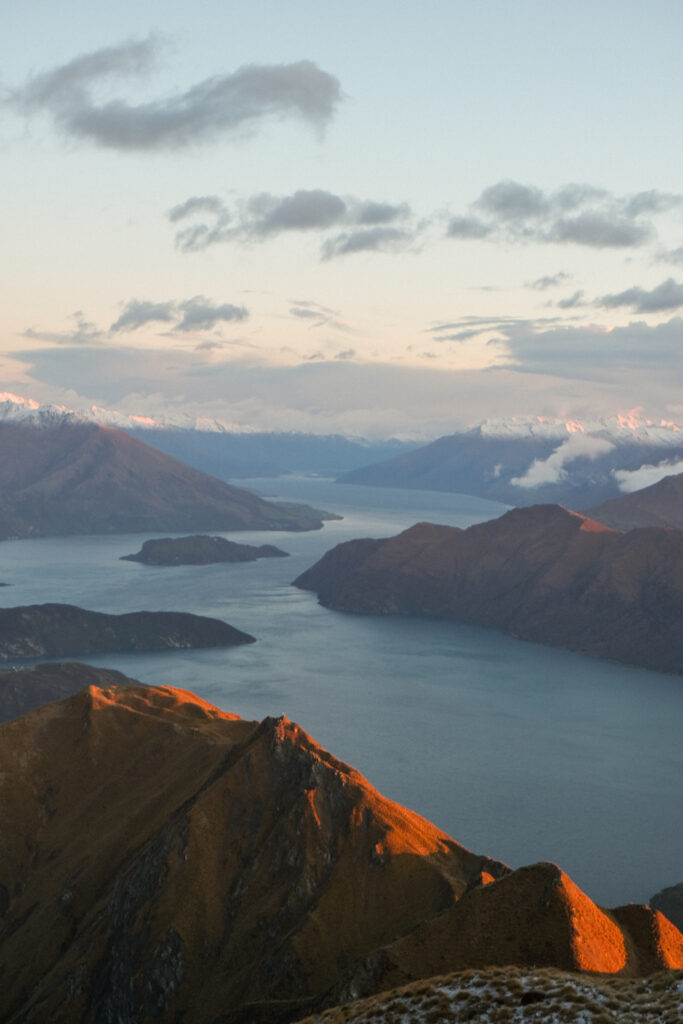
Reaching the viewpoint at sunrise was absolutely worth it. The light over Lake Wānaka and the surrounding mountains is unreal.
If you still have energy, continue another 20 minutes to the summit with fewer people and even better views.
Practical Information
- Distance: 16 km return
- Duration: 5–7 hours
- Elevation gain: ~1,300 m
- Difficulty: Moderate to challenging
Access Restrictions (Lambing Season)
- Track crosses private farmland
- Closed every year during lambing season (Oct–Nov)
- Dates vary → always check before going
- Fines apply if you enter during closure
Conditions
- No shade → strong sun in summer
- Very exposed to wind
- Cold temperatures outside peak summer
Parking
- Small car park at trailhead
- Fills up very early
- No camping allowed nearby
4. Lake Marian Track – A Short Adventure with a Wild Feel
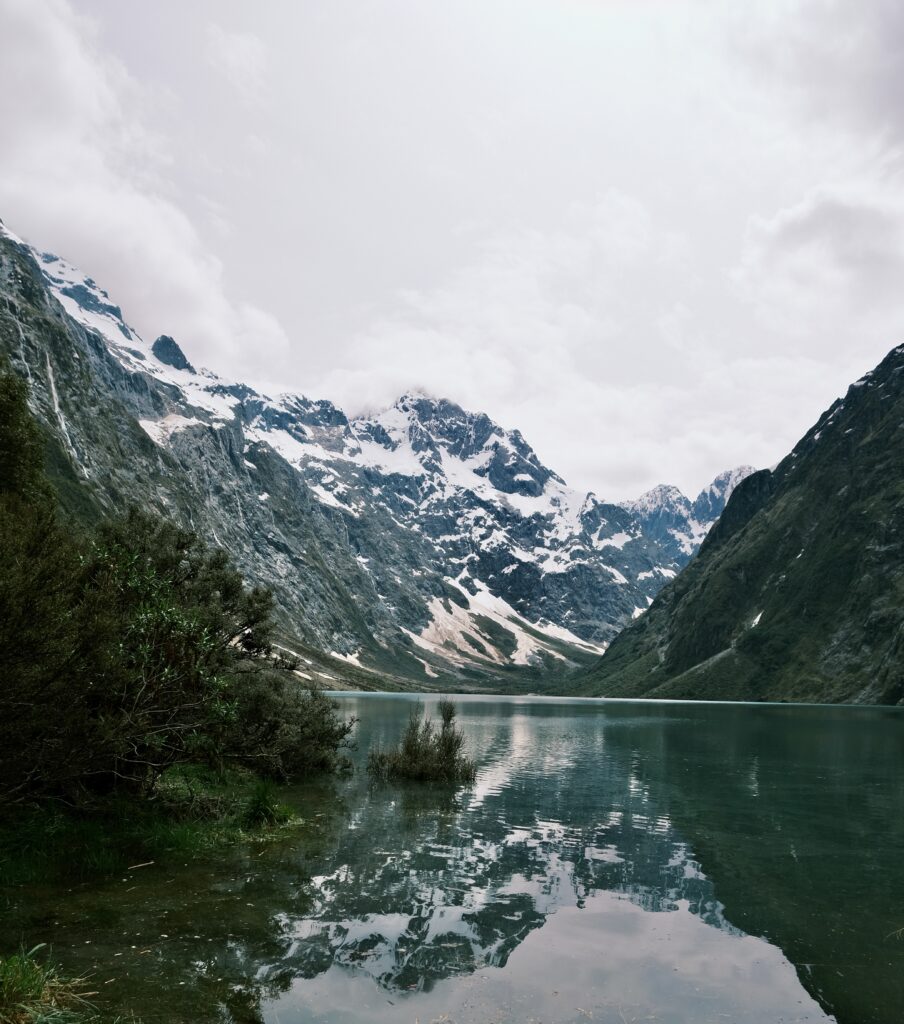
Lake Marian might be shorter than other hikes on this list, but it feels much more adventurous than expected.
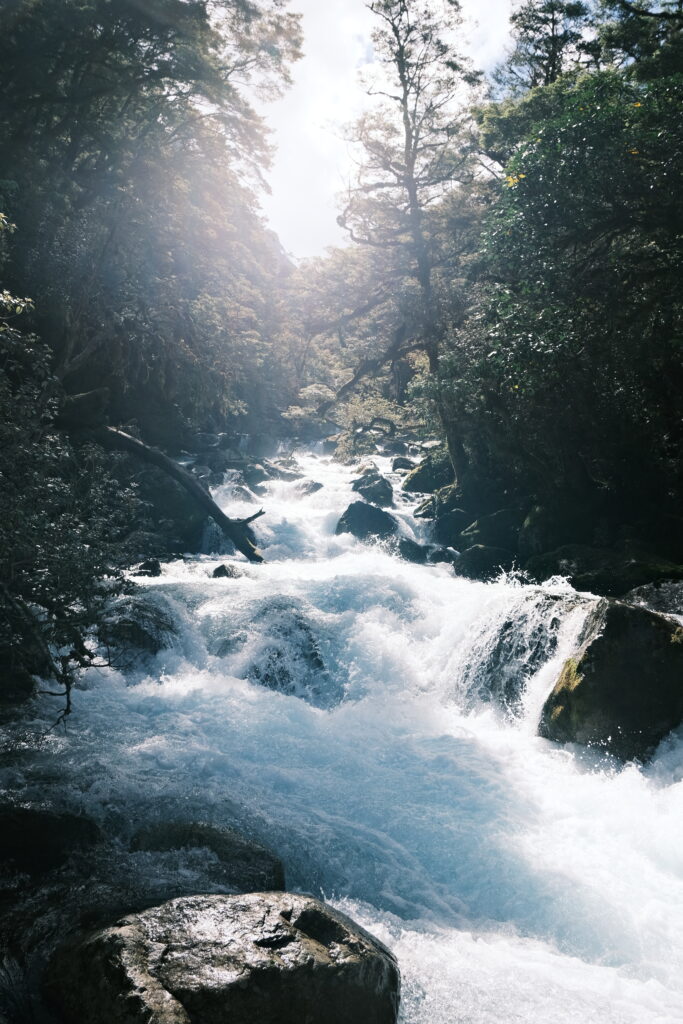
The hike starts relatively easy, following a well-defined path through lush forest. But as you go higher, the terrain becomes more rugged with tree roots, rocks, and small sections where you’ll need to use your hands to climb.
It’s never dangerous, but it definitely adds a bit of fun and makes the hike feel less “touristy” and more like a real adventure.
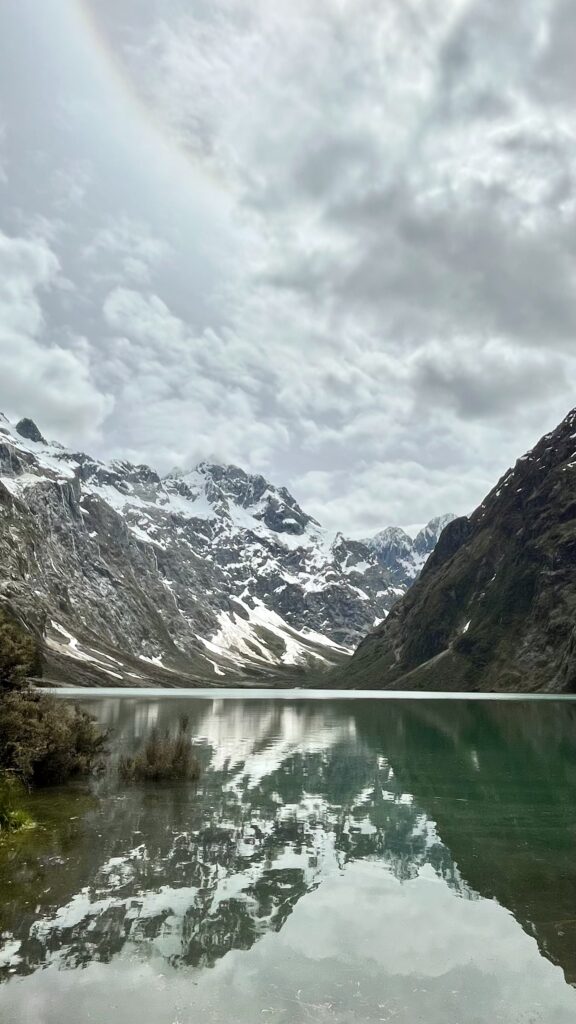
After about 1.5 to 2 hours, you reach Lake Marian an alpine lake surrounded by steep, dramatic mountains.
On a calm day, the reflections on the water are incredible. The whole place feels quiet, raw, and untouched especially compared to more popular spots like Milford Sound.
Practical Information
- Distance: ~6 km return
- Duration: 3–4 hours
- Elevation gain: ~400 m
- Difficulty: Moderate
Trail Conditions
- Uneven terrain (roots, rocks, mud)
- Slippery after rain
- Not suitable for flip-flops or basic sneakers
Location & Access
- Located along the road to Milford Sound
- Small parking area near the trailhead
- Popular stop, but less crowded than major hikes
Tips
- Go early to enjoy the lake without too many people
- Bring a swimsuit if you’re brave, but water is freezing
5. Hooker Valley Track – The Most Accessible Alpine Hike in New Zealand
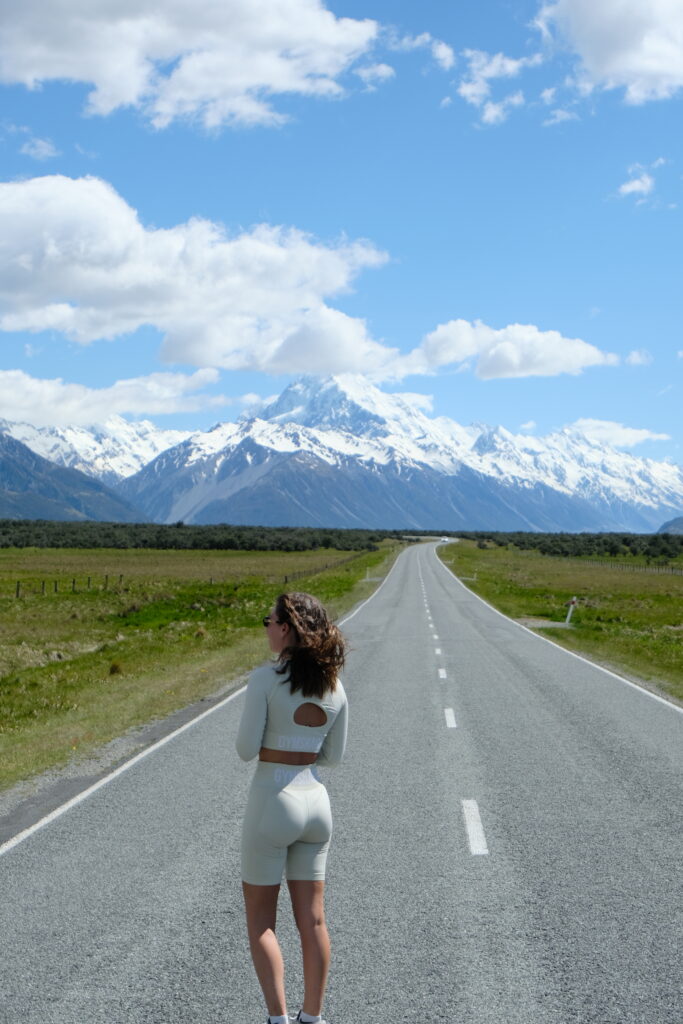
The Hooker Valley Track is often described as one of the easiest hikes in New Zealand but don’t let that fool you.
This trail delivers some of the most impressive alpine scenery in the country, without requiring advanced fitness or hiking experience.
From the very beginning, the views are constant. You’re surrounded by glacial valleys, snow-capped peaks, and wide open landscapes that make you feel incredibly small.
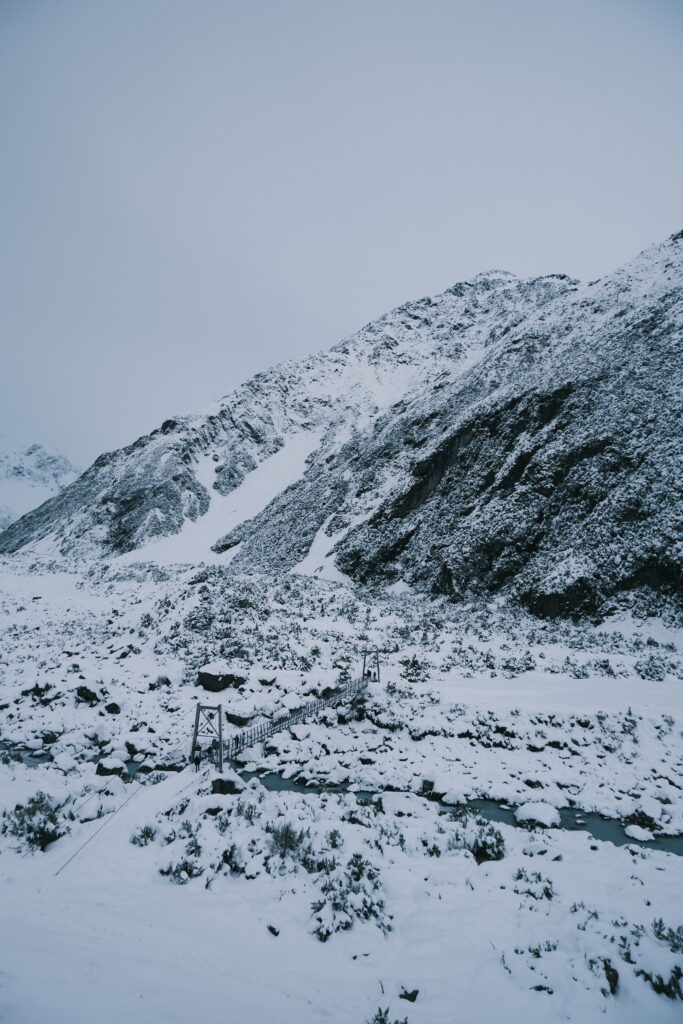
The track itself is mostly flat and very well maintained, making it accessible for almost everyone. Along the way, you’ll cross three swing bridges, which honestly add a fun element to the hike especially with the views of the river below.
What makes this hike really special is that the scenery keeps building up gradually. It never feels repetitive; each section reveals something new.
At the end of the track, you reach Hooker Lake, a glacial lake often filled with small floating icebergs, depending on the season. Right in front of you stands Aoraki / Mount Cook, New Zealand’s highest mountain.
It’s one of those places that genuinely doesn’t feel real.
However and this is important your experience can vary a lot depending on track conditions.
When I did it in November, part of the trail was closed, and we could only go as far as the second swing bridge. Even though it was still beautiful, it’s definitely something to be aware of before planning your hike.
Practical Information
- Distance: 10 km return (full track)
- Duration: 2.5–3.5 hours
- Elevation gain: Minimal (~100 m)
- Difficulty: Easy
Track Conditions & Closures
- The track is prone to:
- flooding
- strong winds
- maintenance closures
- flooding
- Swing bridges may close in bad weather
- Sections of the track can be restricted (as in my case)
Always check the official DOC website before going
Parking & Access
- Main parking: White Horse Hill Campground car park
- It can fill up quickly in peak season (especially midday)
- Arrive early or late afternoon for fewer crowds
Best Time to Go
- Early morning → fewer people + softer light
- Late afternoon → golden light on the mountains
- Weather is key: clouds can completely hide Aoraki
What to Bring
- Windproof jacket (very exposed valley)
- Sunglasses + sunscreen (strong alpine UV)
- Water (no facilities on the track)
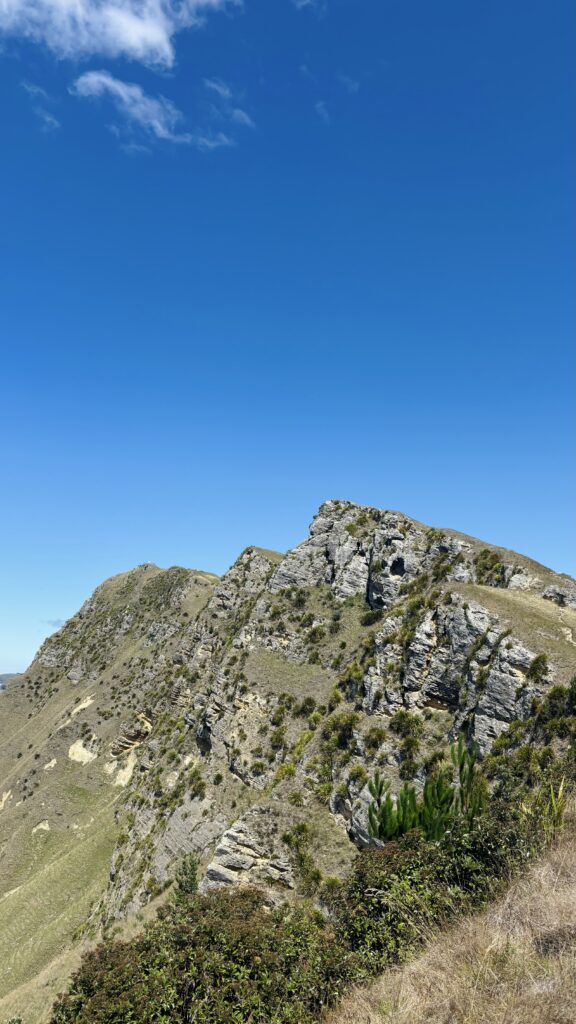
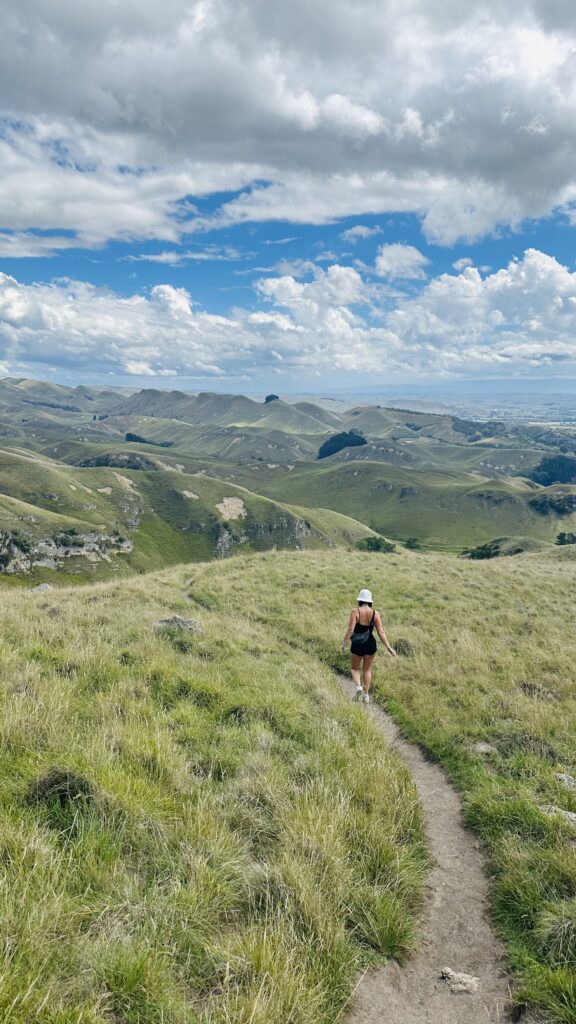
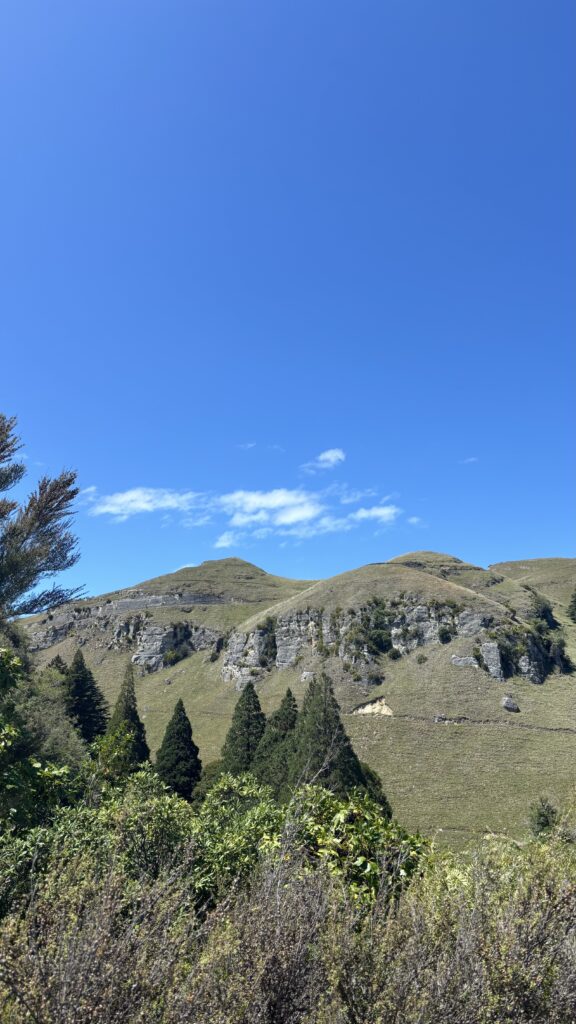
6. Te Mata Peak – Rolling Hills, Epic Views & Māori Legends
Te Mata Peak is one of those places that feels completely different from the rest of New Zealand.
Instead of alpine or volcanic landscapes, you get rolling green hills, sharp ridgelines, and wide open views over Hawke’s Bay. It almost feels softer but still dramatic in its own way.
I did the Goat Track starting from the lower car park, which I’d definitely recommend if you want the full experience. The trail gradually climbs through hills and ridges, and at times it honestly feels like you’ve stepped into a scene from The Lord of the Rings film trilogy.
The higher you go, the more the landscape opens up. Once at the top, you get panoramic views over vineyards, coastline, and farmland stretching endlessly.
But what makes this place even more special is its cultural significance.
According to Māori legend, Te Mata Peak represents a giant who fell in love and, in trying to prove his strength, attempted an impossible task ultimately becoming part of the landscape itself. Knowing this adds a completely different layer to the hike.
Practical Information
- Distance: varies depending on route (~3–5 km for Goat Track)
- Duration: 1.5–3 hours
- Elevation gain: ~300–400 m
- Difficulty: Easy to moderate
Trail Options
- Multiple tracks available:
- Goat Track (most popular, scenic)
- Summit road (you can also drive up)
- Goat Track (most popular, scenic)
- You can combine trails for a longer hike
Parking
- Lower car park (recommended for hiking)
- Upper car park (if you drive to the top)
Best Time to Go
- Sunrise or sunset for the best light
- Midday can be very hot (little shade)
Tips
- Bring water — very exposed area
- Wind can be strong at the top
- Great spot for photography
7. Mount Maunganui Summit Track – Short Hike, Big Reward
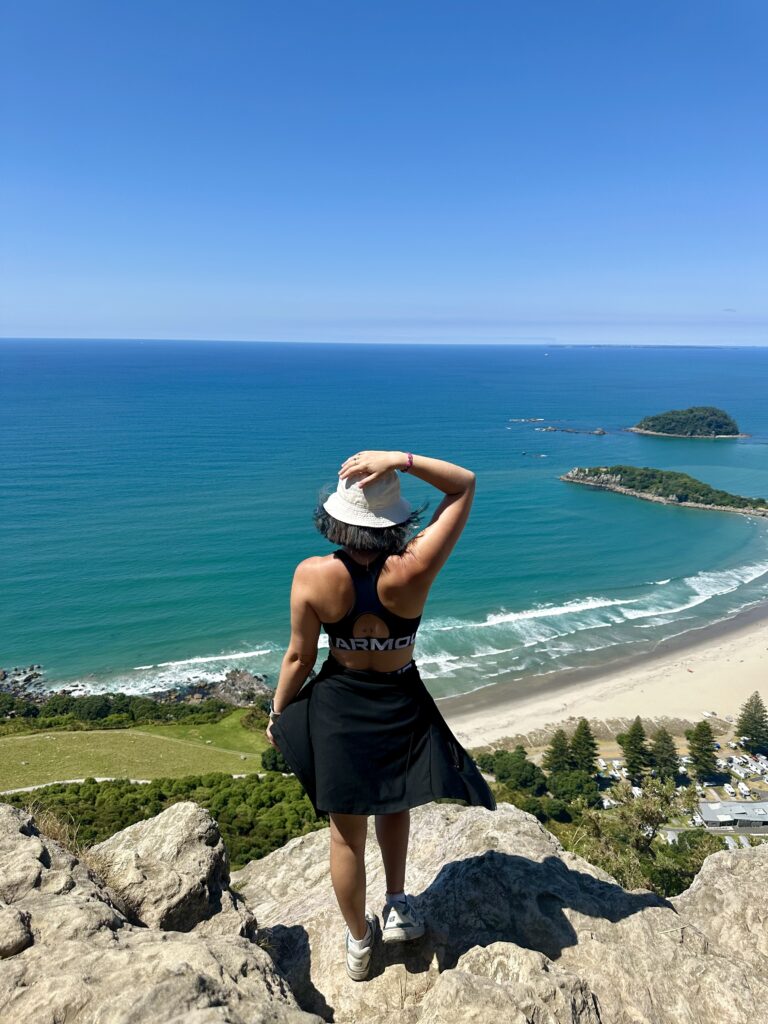
Mount Maunganui (also known as Mauao) is one of the most iconic short hikes in New Zealand.
It’s the kind of hike that looks easy on paper but still gets your heart rate up pretty quickly.
The track is well maintained and relatively short, but the incline is constant enough to feel like a proper workout. You’ll pass through sections of vegetation before the view starts opening up more and more as you climb.
At the summit, you get a full 360° panorama: ocean, beaches, the town, and the surrounding coastline. It’s one of the best viewpoints on the North Island for such a short effort.
It’s also a place of deep cultural significance for Māori, which adds meaning beyond just the physical hike.
Practical Information
- Distance: ~3–4 km return
- Duration: 1–2 hours
- Elevation gain: ~230 m
- Difficulty: Easy to moderate
Trail Options
- Summit track (steeper, quicker)
- Base track (flat loop around the mountain)
- You can combine both
Parking
- Several parking areas around the base
- Can get very busy during the day and weekends
Best Time to Go
- Sunrise → quieter + magical light
- Sunset → very popular but beautiful
- Midday → crowded and hot
Tips
- Bring water (even if short)
- Wear proper shoes (can be slippery in places)
- Expect crowds — this is a very popular spot
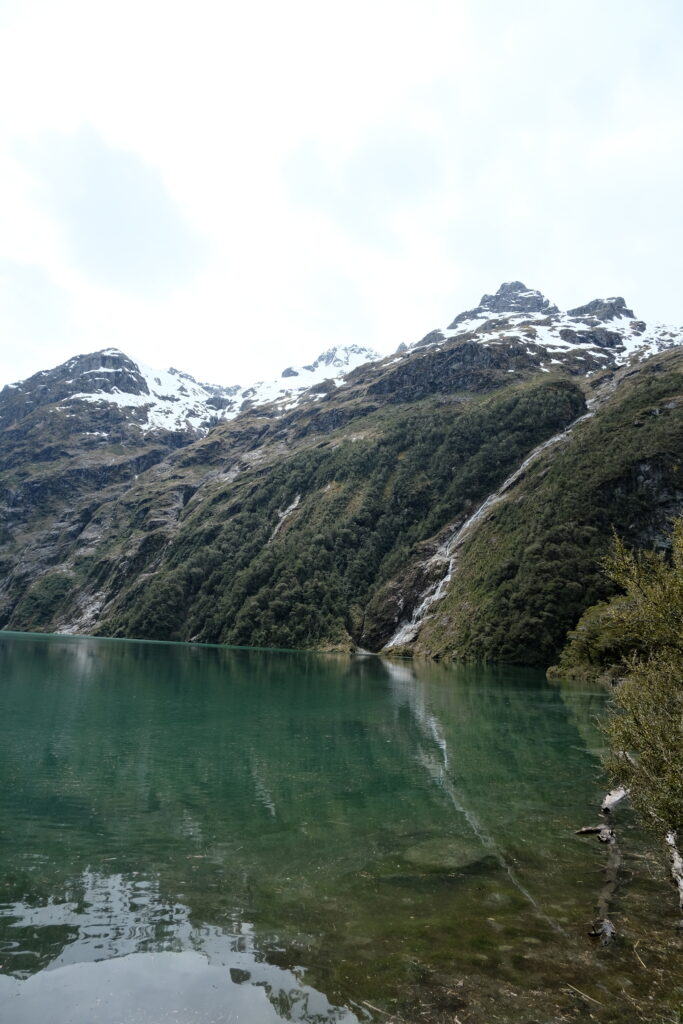
8. Lake Daniell – A Peaceful Escape Deep in the Forest
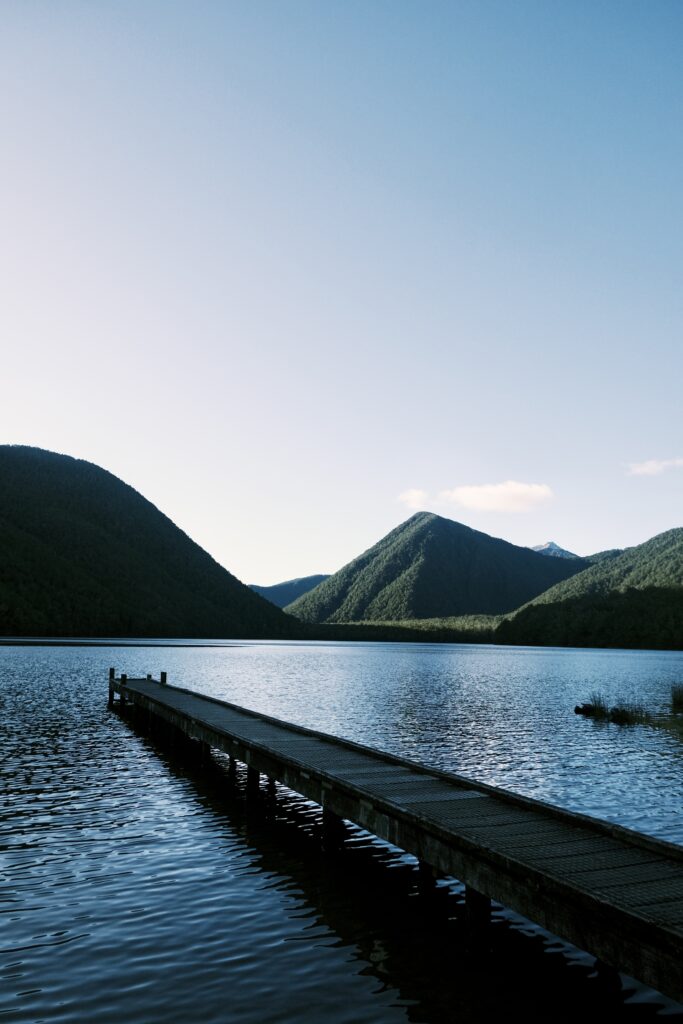
Lake Daniell is the kind of hike you do when you want to disconnect.
Unlike many other hikes in New Zealand, this one isn’t about dramatic views every five minutes, it’s about the journey through dense native forest and the quiet atmosphere that comes with it.
The trail is long but relatively easy, with a gentle and consistent incline. Most of the hike takes place under the forest canopy, which makes it feel calm, shaded, and almost meditative.
It’s not the most “visually spectacular” hike along the way but that’s also what makes the reward at the end feel so special.
After 3–4 hours, you reach Lake Daniell: a peaceful alpine lake surrounded by forest, with a hut nearby that makes it a perfect overnight destination.
I did it as a day hike (return), which is definitely doable but quite long. If I had to do it again, I would 100% stay overnight to enjoy the place more.
Practical Information
- Distance: ~18 km return
- Duration: 6–8 hours return
- Elevation gain: ~500 m
- Difficulty: Easy
Hut & Overnight Stay
- Lake Daniell Hut available near the lake
- Booking recommended in peak season
- Staying overnight allows:
- sunset & sunrise at the lake
- a more relaxed experience
- sunset & sunrise at the lake
Trail Conditions
- Mostly well-formed forest track
- Can be muddy after rain
- Gentle incline, no technical sections
Parking & Access
- Car park located near Lewis Pass
- Easy access from the main road
Tips
- Bring enough food and water (long hike)
- Insect repellent can be useful
- Ideal for those looking for a quieter, less touristy experience
9. Ben Lomond Track (Queenstown)
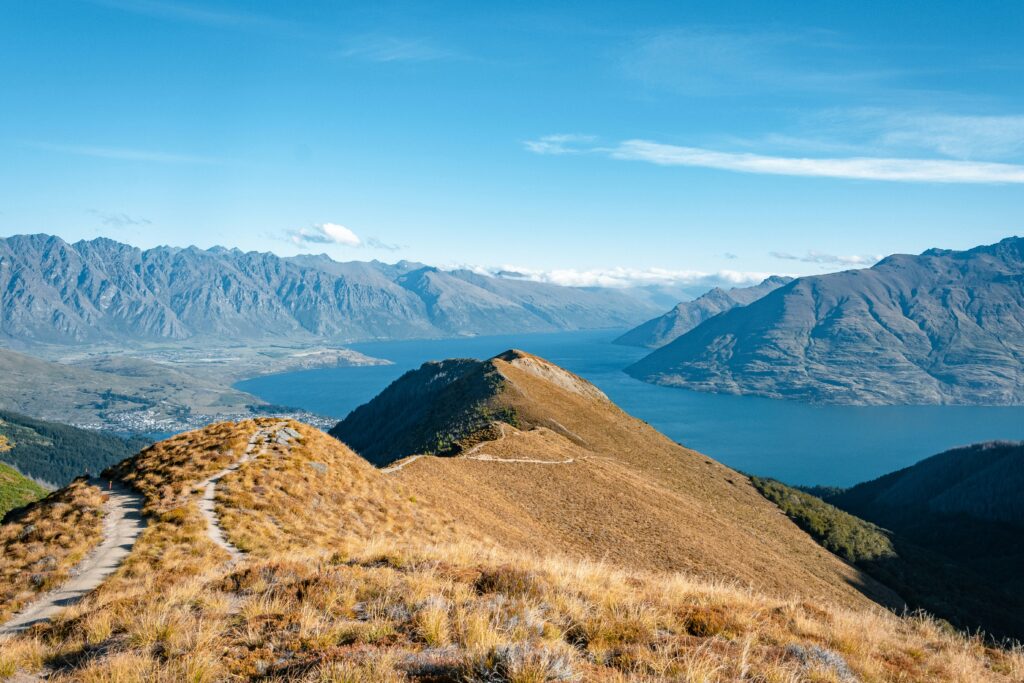
If you’re looking for one of the best panoramic hikes in New Zealand with relatively easy access, the Ben Lomond Track is an absolute must-do. Located just above Queenstown, this hike offers breathtaking 360° views over Lake Wakatipu, the Remarkables, and the surrounding alpine ranges.
The hike starts from town, making it incredibly convenient if you don’t have a car. Many hikers choose to begin via the Tiki Trail, which climbs steeply through the forest to reach the Skyline Gondola. From there, the track continues above the treeline into more exposed alpine terrain.
The first section to the saddle is already rewarding, but the final push to the summit is where things get serious. It becomes steeper, more technical, and fully exposed to wind and weather. However, once you reach the top, the view is absolutely insane, one of the best in the South Island.
This is a physically demanding hike, especially if done from the bottom, but it’s very achievable with a good level of fitness.
Practical Info
- Distance: ~11 km (return from Gondola), ~16 km from town
- Time: 6–8 hours return
- Difficulty: Moderate to hard
- Start point: Queenstown (Tiki Trail or Skyline Gondola)
- Best time: November to April
Important tips:
- The summit section is exposed — avoid in strong wind or bad weather
- Proper hiking shoes are essential (steep and loose terrain near the top)
- You can take the gondola to save time and energy (around 70 NZD, in 2026)
- In winter, snow and ice make the summit dangerous without equipment
- No shade after the forest — sun protection is key
10. Brewster Hut Track (West Coast / Mount Aspiring National Park)
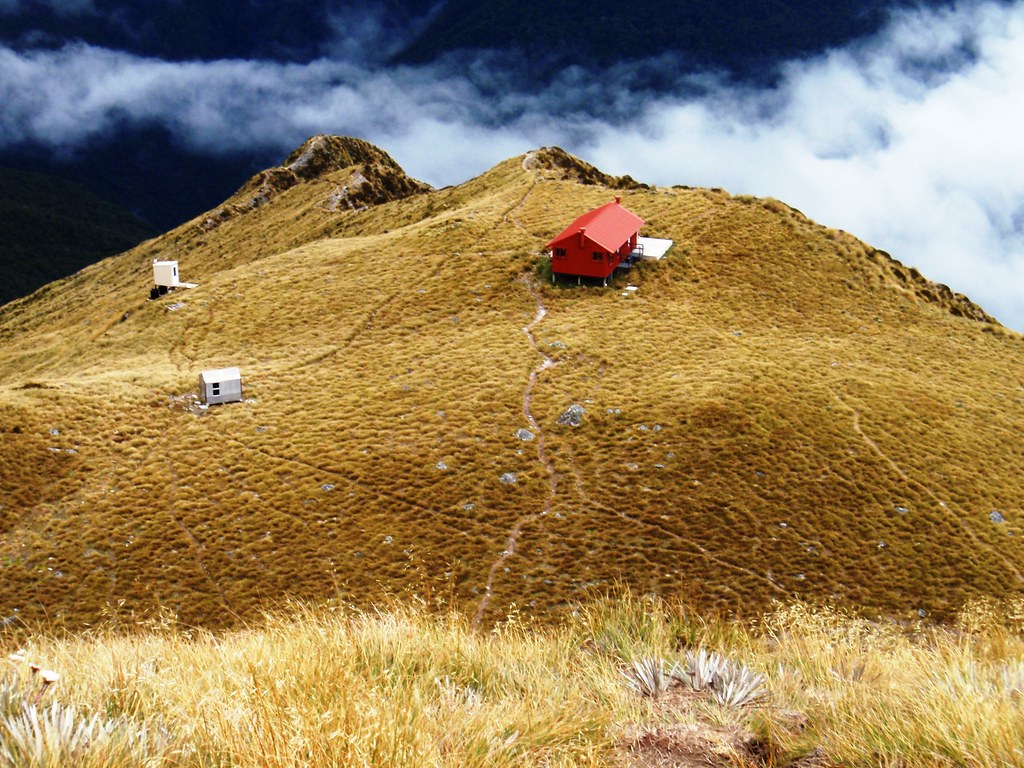
If you’re looking for a short but intense alpine adventure with one of the best hut views in New Zealand, the Brewster Hut Track is an absolute gem. Located near the Haast Pass on the West Coast, this hike packs a serious punch for its distance, taking you from dense rainforest all the way up to an exposed alpine ridge overlooking glaciers.
The hike starts just off the road, crossing a swing bridge over the Haast River before entering thick native forest. The first part feels almost tropical, with tree roots, mud, and steep sections that require constant attention. It’s a proper leg burner right from the beginning.
As you climb higher, the forest gradually opens up, revealing your first glimpses of the surrounding mountains. The final section is the most challenging: steep, rocky, and exposed, especially in wet or windy conditions. But once you reach the hut… it’s absolutely unreal.
Perched on a ridge, Brewster Hut offers panoramic views over the Brewster Glacier and the Southern Alps. It’s the kind of place where you’ll want to stay for sunset and sunrise. When the light hits the peaks, the whole landscape turns golden.
Even if you don’t stay overnight, reaching the hut is already an unforgettable experience.
Practical Info
- Distance: ~5 km return
- Time: 4–6 hours return
- Difficulty: Hard (very steep)
- Start point: Haast Pass (car park just off SH6)
- Best time: December to April
Important tips:
- This track gets extremely slippery in the rain, roots and mud can make it dangerous
- Expect steep climbing almost the entire way (hands sometimes needed)
- The swing bridge at the start can be intimidating but is safe
- Brewster Hut must be booked in advance if staying overnight (very popular!)
- Sunrise and sunset are the best moments up there — totally worth staying
- In colder months, snow and ice can make the upper section hazardous
- Parking is limited along the road — arrive early in peak season
- Sandflies can be brutal at the start (welcome to the West Coast)
Extra : Isthmus Peak Track (between Lake Hawea & Lake Wanaka)
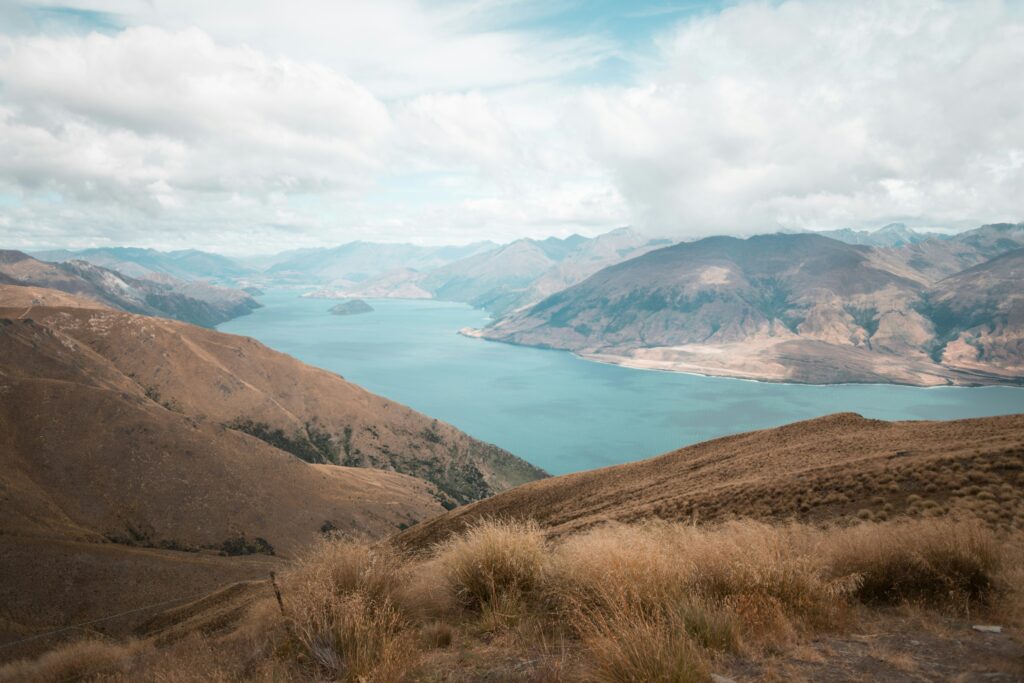
If you’re chasing one of the most unique viewpoints in New Zealand, Isthmus Peak should be high on your list. This hike offers a rare perspective where you can see both Lake Hawea and Lake Wanaka at the same time something you won’t find anywhere else in the country.
Located just outside Wanaka, the track starts from a private farm and climbs steadily through open fields before transitioning into alpine terrain. Unlike many hikes in New Zealand, there is very little shade, which means you’re exposed to the sun pretty much the entire way up.
The climb is constant and can feel long, but the trail itself is well-formed and not technically difficult. As you gain elevation, the views start opening up behind you and they just keep getting better with every step.
The final section to the summit is where it all comes together. Standing at the top, you get a panoramic view over both lakes stretching in opposite directions, surrounded by mountains. It’s one of those landscapes that doesn’t even look real.
Sunrise and sunset are especially magical here, with soft light reflecting on both lakes.
Practical Info
- Distance: ~16 km return
- Time: 5–7 hours return
- Difficulty: Moderate to hard (mainly due to elevation gain)
- Start point: Isthmus Peak car park (near SH6 between Wanaka & Hawea)
- Best time: October to April
Important tips:
- Track closures: The trail is sometimes closed during lambing season (usually October–November) since it crosses private farmland — always check before you go
- No shade at all — bring sun protection, especially in summer
- Carry plenty of water (no refill points on the track)
- The summit can be very windy — bring a warm layer even on sunny days
- You’ll walk through farmland — respect gates and livestock
- Parking is limited and fills up quickly during peak season
- The track is not technical, but the climb is long and steady
Extra: Cathedral Cove Walk (Coromandel Peninsula)
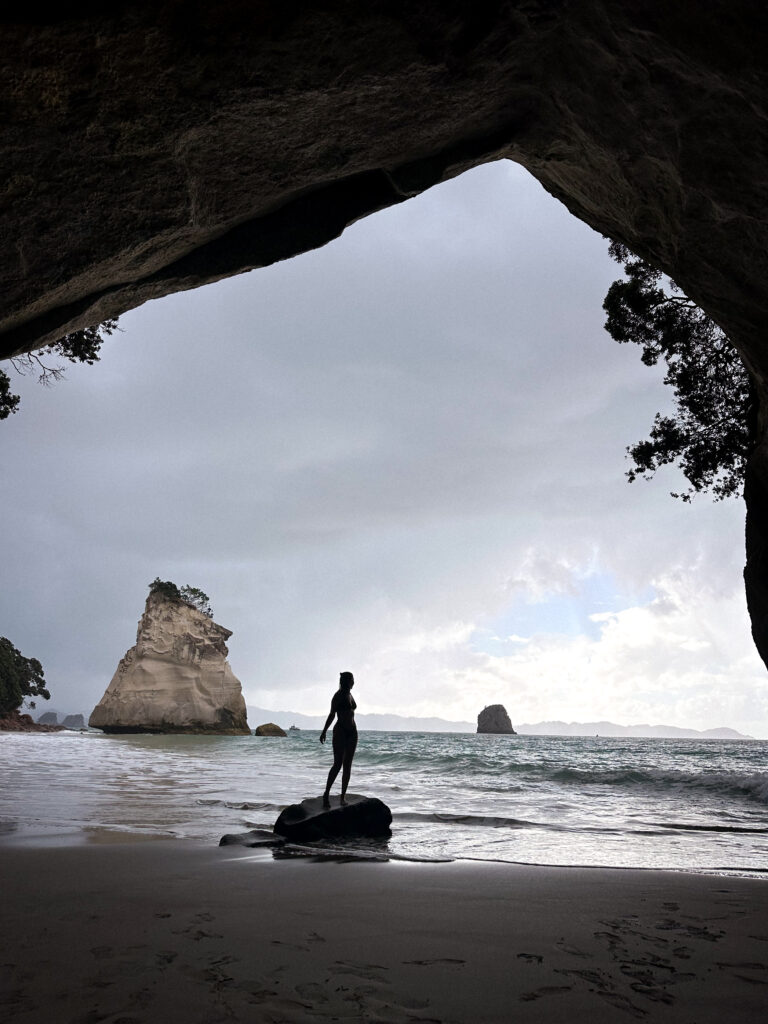
The walk to Cathedral Cove is one of the most famous coastal hikes in New Zealand and for good reason. Located on the beautiful Coromandel Peninsula, this short walk leads to a spectacular natural rock arch opening onto a white sand beach and turquoise water.
Unlike many of the alpine hikes in New Zealand, this trail offers a completely different landscape: golden cliffs, pohutukawa trees, hidden coves, and panoramic ocean views along the way.
The track follows the coastline above the Pacific Ocean, with several viewpoints where you can stop to admire the scenery. On clear days, the water below turns an incredible shade of blue that almost feels tropical.
The highlight of the walk is, of course, Cathedral Cove itself. The massive natural arch carved into the cliff connects two beaches and creates one of the most photogenic landscapes in the country. When the tide is low, you can walk through the arch and explore both sides of the cove.
Because of its beauty and easy access, the track is extremely popular especially during summer but visiting early in the morning or later in the evening can make the experience much more peaceful.
If you want to learn more about this stunning coastal walk, you can read my complete guide to Cathedral Cove here, where I share practical tips, the best time to visit, and everything you need to know before going.
Practical Info
- Distance: ~2.5 km one way (5 km return)
- Time: 1.5–2 hours return (longer if you stay at the beach)
- Difficulty: Easy
- Start point: Cathedral Cove car park / shuttle stop
- Best time: Early morning or sunset
Important tips:
- Parking restrictions: The original car park near the track has been closed for several years due to safety and landslide risks. Most visitors now park in Hahei and either walk or take a shuttle to the trailhead.
- Shuttle services: During busy seasons, shuttle buses run between Hahei village and the start of the track.
- Track conditions: Parts of the trail have occasionally been closed in recent years due to storm damage and landslides, so it’s always best to check conditions before visiting.
- Tides matter: At high tide, the beach area under the arch can be smaller, while low tide allows you to explore more easily.
- Bring water and sun protection: The track is exposed in many sections and can get very hot in summer.
- Best photo moments: Sunrise and sunset offer the most beautiful light and far fewer crowds.
Final Thoughts
New Zealand is often described as a hiker’s paradise and after exploring these trails, it’s easy to understand why. From dramatic volcanic landscapes on the Tongariro Alpine Crossing to the alpine views of Roy’s Peak or the peaceful forest trail leading to Lake Daniell, every hike offers a completely different experience.
One of the things that makes hiking in New Zealand so special is how diverse the landscapes are. In a single trip, you can walk across active volcanic terrain, climb above turquoise lakes, wander through ancient native forests, or reach coastal viewpoints like Cathedral Cove. Few countries offer such a variety of scenery within relatively short distances.
What I also loved about hiking here is that many of these trails are accessible without needing technical mountaineering skills. With good preparation, the right gear, and a bit of determination, you can experience some of the most spectacular landscapes in the world.
Of course, conditions in New Zealand can change quickly especially in alpine environments so always check the weather, track conditions, and local advice before heading out. Taking the time to plan properly will make your experience much safer and far more enjoyable.
Whether you’re chasing sunrise on a mountain ridge, exploring a quiet alpine lake, or simply enjoying the journey along the trail, hiking is truly one of the best ways to experience the raw beauty of New Zealand.
And honestly, after doing a few of these hikes… it’s very likely you’ll start planning the next one before you’ve even finished the first.